Having your clothes professionally dry cleaned can get expensive, especially when you have a lot of items that require special care. Most items that contain "dry clean only" labels can actually be dry cleaned at home with a dry cleaning kit. Learn how to determine which items can be dry cleaned at home, perform the dry cleaning process using a kit, and finish the job to give your clothes a professional dry-cleaned look.
Part 1 of 3: Preparing to Dry Clean Your Clothes
1.Know which items are safe to dry clean at home. Start by checking the tag on the clothing item in question. Clothes made from wool, rayon and silk are often marked "dry clean only," and you should have no trouble cleaning them yourself.Clothes that are technically machine washable, but that you would prefer to treat gently, are good candidates for home dry cleaning. Try dry cleaning delicate linens and cottons, and clothing with intricate embroidery or other decorations. Dry cleaning instead of washing will make delicate items last longer and look new longer.Clothes made from leather, suede and fur should not be dry cleaned at home. These items require special techniques to clean and are best left to professional cleaners.
2.Examine how heavily soiled the items in question are. Home dry cleaning works best on items that are only lightly soiled. A stain or two is ok, but if the item is covered in mud or another substance, it's probably better to have it professionally cleaned.
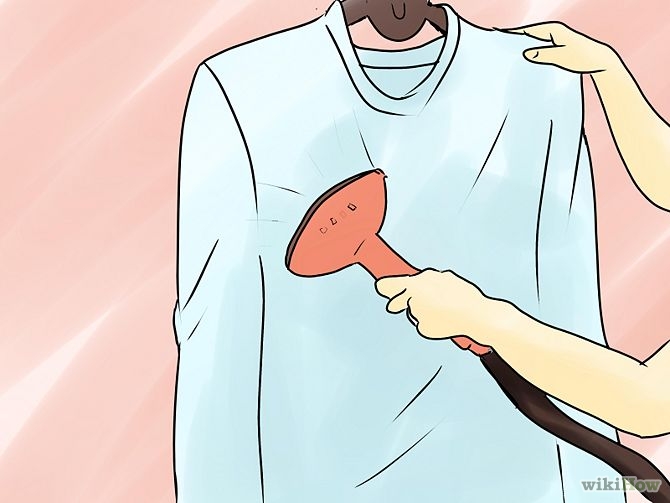
3.Use a stain remover to remove stains. Dry cleaning kits come with small bottles or pens filled with stain remover. Treat oil or water based stains with the stain remover to prepare your clothing for dry cleaning. Instructions that come with the dry cleaning kit indicate to use only the stain remover provider. They also provide details on avoiding the spot spreading and how to avoid a visible ring after treatment.Test the stain remover on a discreet spot on the fabric you're cleaning before using it to remove prominent stains. Make sure it doesn't cause damage or discoloration before proceeding.Since you're presumably working with delicate fabric, don't scrub the fabric too much, or you could damage it.Use the stain remover only on the stain. If you soak the entire garment in stain remover, you could damage its shape and fibers.Don't use stain remover on suede, leather, or fur. These materials cannot be dry cleaned at home anyway, so aren't part of these instructions.
1.Place your items of clothing inside the dry cleaning bag. Every kit comes with a bag that fits three or four pieces of clothing. Make sure they are similar colors, to prevent the chance of bleeding dye ruining an article of clothing. When you load the bag, also pay attention to the weight and bulk of the items. The bag should not be more than halfway full. The key is that the items need to have room to rotate inside the bag. If you are cleaning a throw, for example, you may not be able to add three additional items.Don't overcrowd the bag. If you're dry cleaning dresses, place only two dresses inside a large bag. You should be able to fit up to four tops inside a large dry cleaning bag. Again, only fill the bag halfway full to allow adequate rotation of the garments inside the bag.
2.Completely unfold the dry cleaning sheet and place it inside the dry cleaning bag. Zip the bag closed.The dry cleaning sheet contains a small amount of water, an emulsifier to keep it dispersed, and a perfume to freshen the smell of your clothes.As the dryer heats the sheet, it will create steam that infuses your clothes with fragrance and straightens out wrinkles.
3.Put the dry cleaning bag inside the dryer. Make sure the lint filter is clean. Set the dryer on medium heat for 30 minutes. Use the timed setting, not the automatic setting. If your dryer does not have a medium setting, err on the side of caution and use low heat. If you are using a laundromat dryer, make sure the heat setting is adjustable and use low heat. As soon as the timer goes off, retrieve the clothes from the dryer.The longer you allow the clothes to sit in the dryer, the more wrinkled they will be when you remove them from the bag.
4.Remove the clothes from the dry cleaning bag. Hang them on hangers and allow the wrinkles to fall out. If the clothes look satisfactory to you, store them in your closet or wear them immediately.
1.Examine your clothing for stains. You may find that the stain remover didn't quite do the job before you dry-cleaned your clothes. If you still see traces of a stain, use the remover again.
2.Iron your clothing. The articles of clothing won't look stiff and pressed like they do when they come back from professional dry cleaners. Professionals use chemicals to give them that starched look, but at home, running an iron over the clothes is sufficient.Make sure the iron is set to the appropriate heat level for the article you are ironing.Don't spray the item with water, and use steam sparingly.
3.Use a clothing steamer. Clothing steamers can be costly, but if you have a lot of delicate items it may be worth investing in one. They use steam rather than the direct heat of an iron to remove wrinkles. The finished look is crease-free and professional.
4.Store your dry-cleaned items separately. Keep them on hangers in a special place in your closet, making sure there is room for air to circulate around them. This way the clothes will stay fresh longer, and you won't have to dry clean them as often.